Windows Store for Business Application
BizMobileGo! supports for distributing apps purchased on Windows Store for Business to Windows10 devices silently.
There are 4 requirement for this feature
- To purchase the apps from Windows Store for Business
- To sign into Windows10 device as Azure Active Directory account
- The license of apps which are purchased in Windows Store for business are assigned to signed in Azure Active Directory accounts. - To create the connection between Azure Active Directory and BizMobileGo!
- To assign the user who is imported from Azure Active Directory to BizMobileGo! to Windows10 device
You need 3 preparations as below.
- The procedure on Microsoft Azure portal
- The procedure on Windows Store
- The procedure on the management console of BizMobileGo!
Configure store account access keys in Microsoft Azure portal.
If you do not have any account for Microsoft Azure yet, please create it from here.
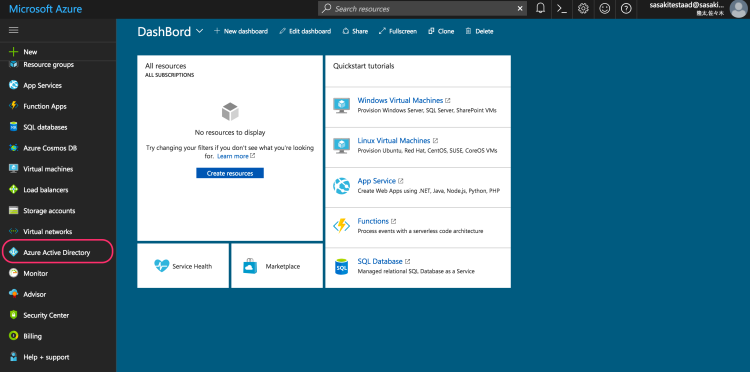
- Log into Microsoft Azure portal.
- Go to Azure Active Directory.
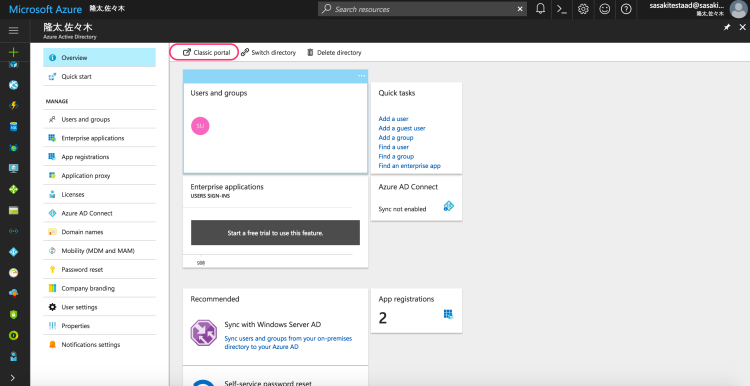
- Click Classic portal.
- Click this icon
 .
.
Select your directory and click APPLICATION.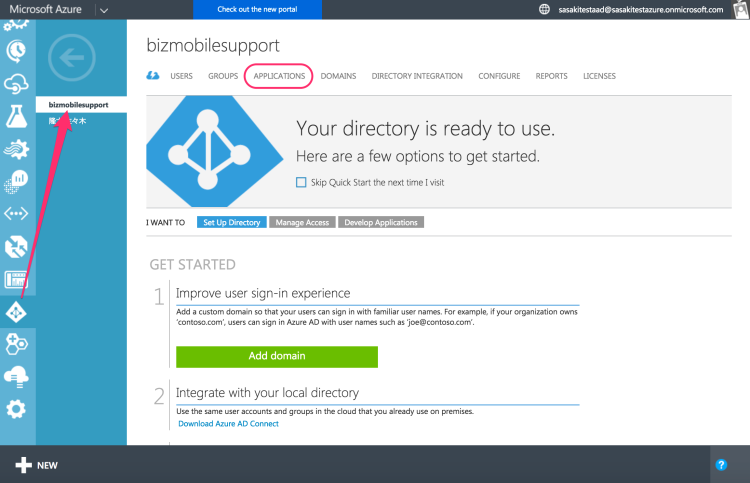
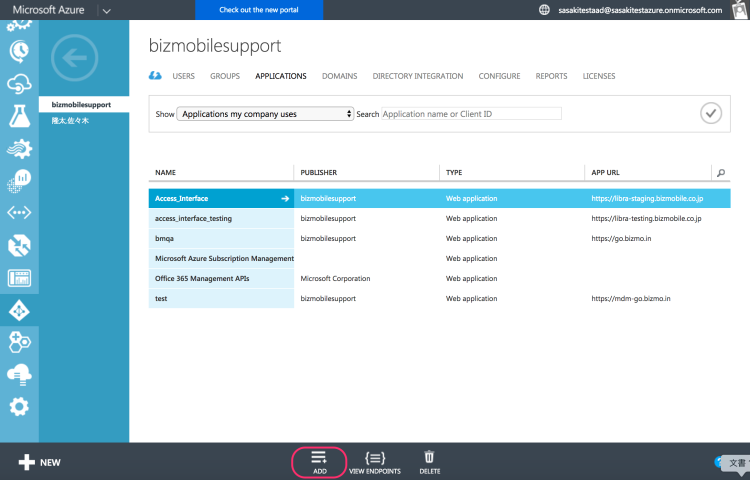
- Click this icon
 .
.
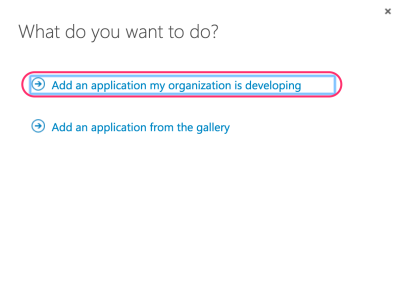
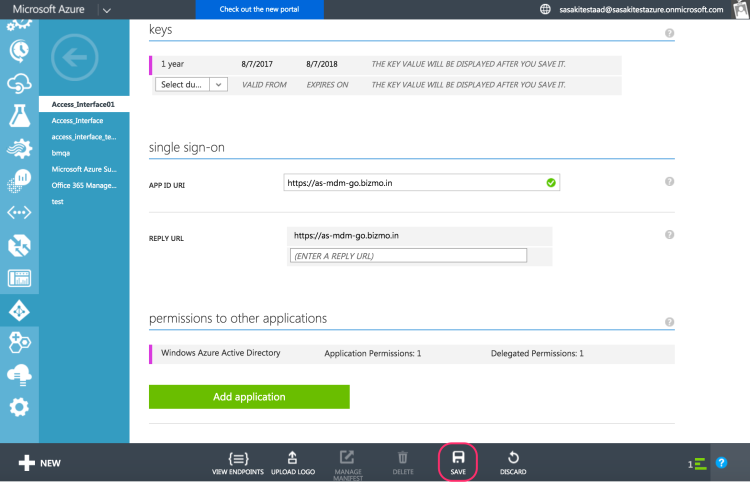
- Click Add an application my organization is developing.
- Enter descriptive name.
Tick WEB APPLICATION AND/OR WEB API.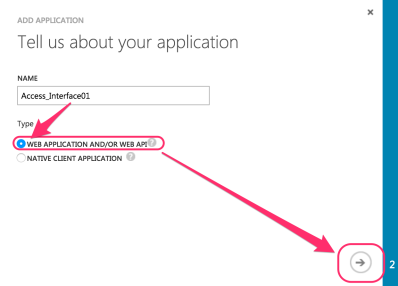
- Enter two URLs.
These values must be a valid URLs but at the moment the actual values are not used.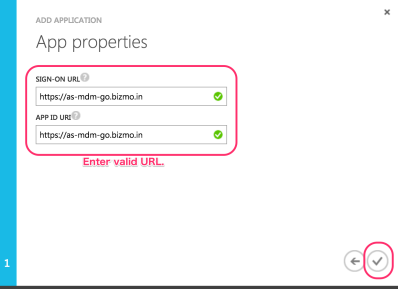
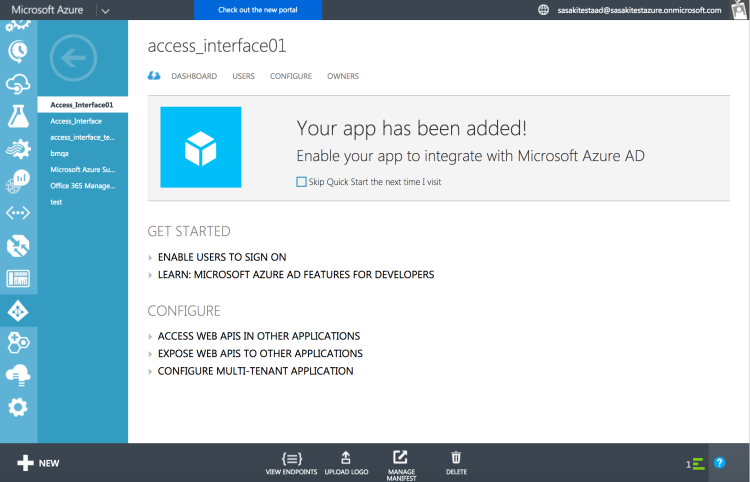
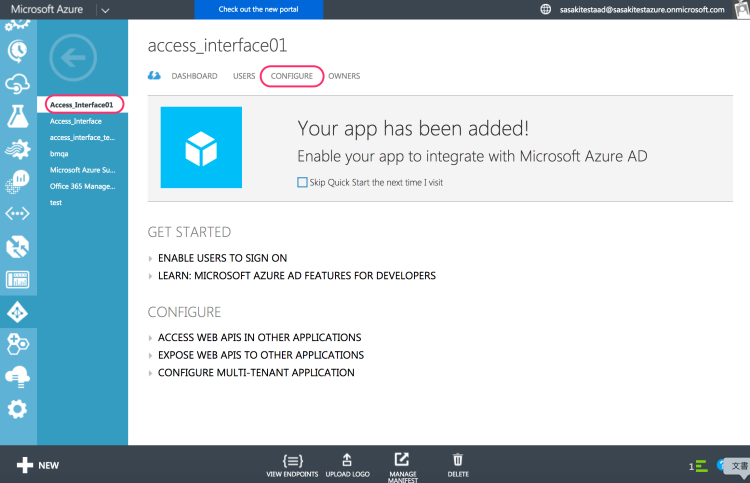
- You can see a message, Your app has been added.
- Click CONFIGURE on the app screen you made.
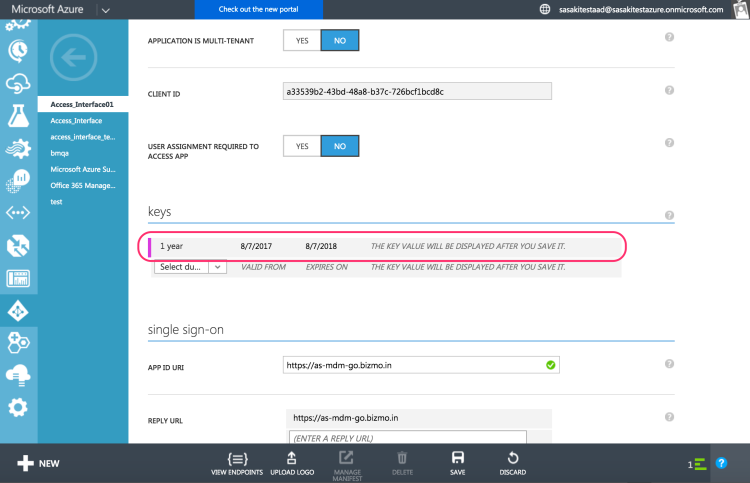
- Select the duration of new key.
- Scroll to permissions to other applications.
Click Application Permissions.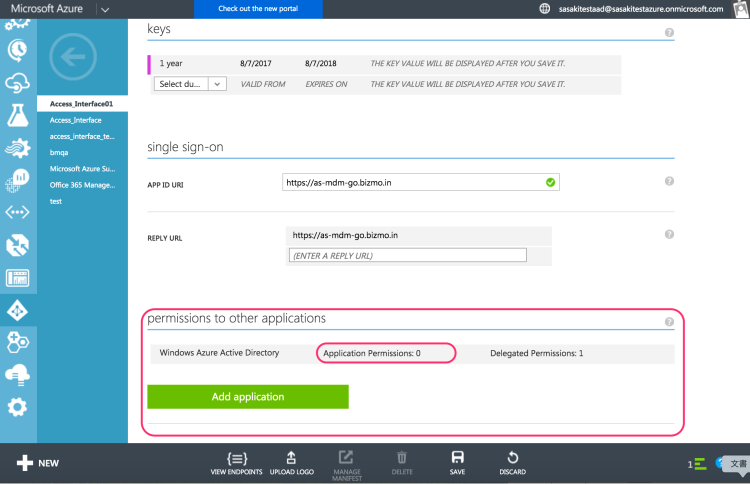
Select Read and write directory data.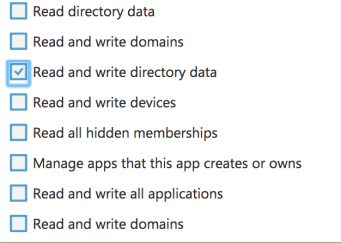
- Click SAVE located at the very bottom in the screen.
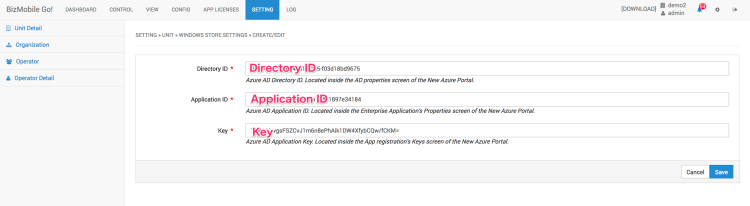
- Note Directory ID, located between /Directory/ and /RegisteredApp/ in the URL, CLIENT ID (Application ID) and Key.
These values are needed to create a connection between Azure Active Directory and BizMon the management console of BizMobileGo! later.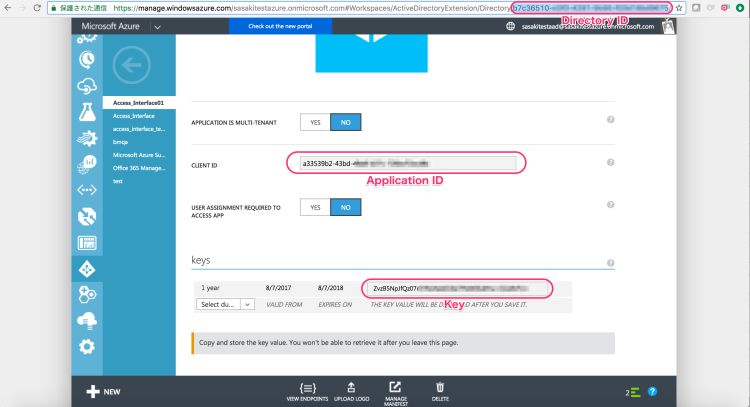
Configure azure permission in store accoun.
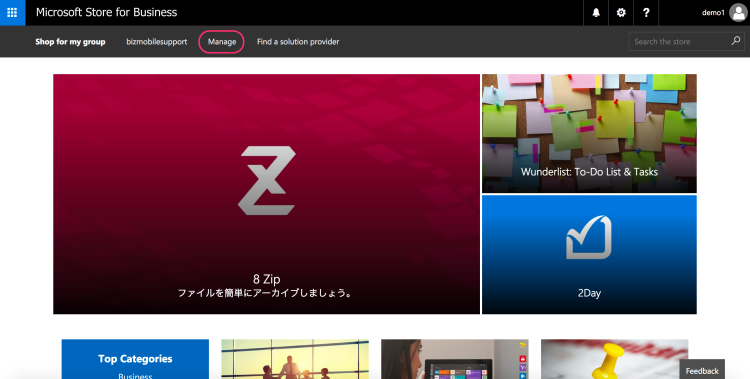
- Log-in to Microsoft Store for Business.
- On the top menu screen, click Manage.
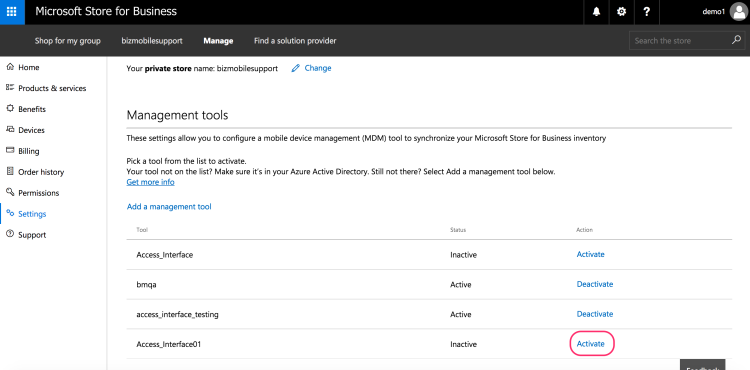
- Go to Setting > Distribute > Add a management tool.
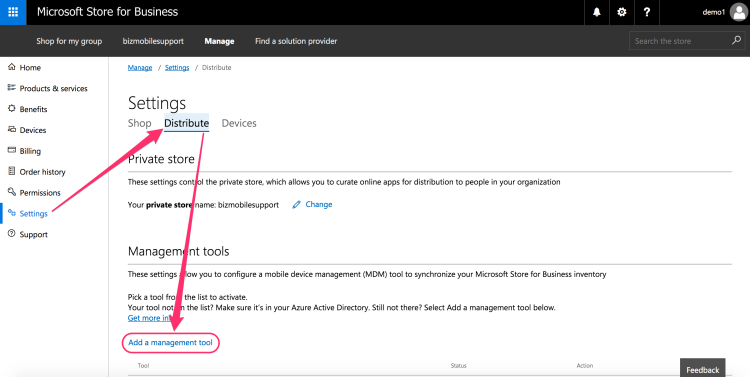
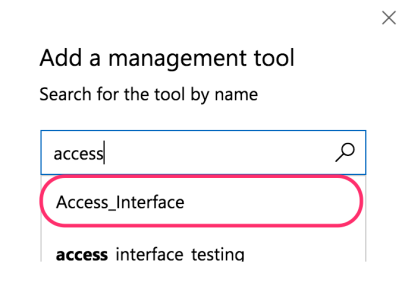
- Search for the Application name by name used step. And click Add.
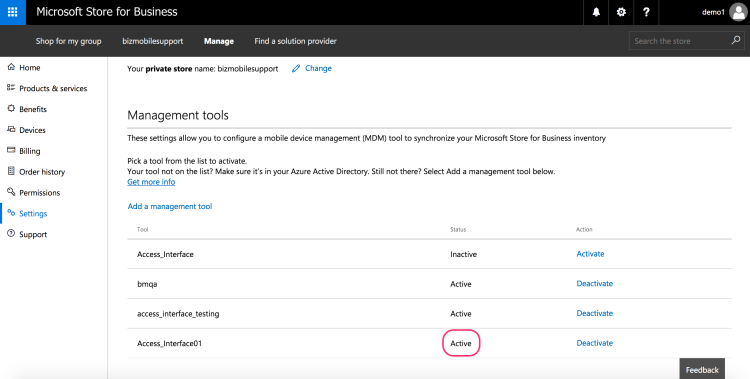
- Click Active.
- You can see the status of application has been changed to Active.
Register the access key on the management console of BizMobileGo!.
- Go to SETTING > Unit Detail > Create/Edit Windows Store Settings.

- Enter the access keys which you noted in this step and click Save.
Confirm the list of users imported to BizMobileGo! from Azure Active Directory.
Go to CONFIG > User.
The users whose Azure AD Registration is mentioned as Registered are imported from Azure Active Directory.
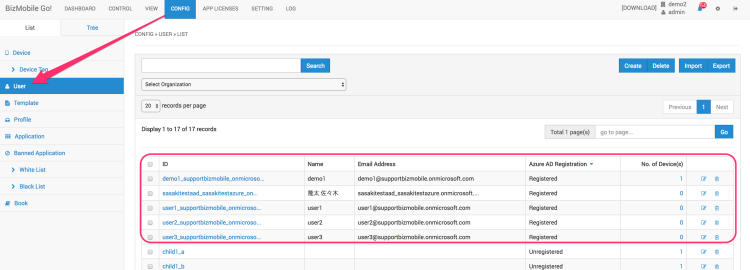
You can assign them to Windows10 devices on the management console.
In the case, a device user sign into the Azure Active Directory on the Windows10 device, apps assigned to the device on management console will be installed.